Overview
Witboost Custom View is a feature that allows platform users to customize some pages of the application to accommodate customers' specific needs. Currently, this approach is applied to overview pages in the marketplace and the builder.
Concepts
The basic idea is that we divide the data processing code, which produces a single object structure with all the data, from the presentation layer. The link between the two is implemented by path references. This will allow the platform team to define pages that show only a subset of the data, or that show the data in different ways. Let's see some examples:
- after creating a complex data structure, with a lot of fields, we want the user to see only a small subset of them, like just the name, and the description;
- we want to show the same data in different ways, like a table, a list, or a sequence of cards;
- after deployment, the descriptor is enriched with some fields that we don't want to show to the end user, so we want to remove them from the page;
- we want to show some data only if a certain condition is met, like showing a field only if it is not empty.
The Custom View feature allows us to safely serialize and deserialize the presentation layer in a file that can be stored outside the code in a configuration backend. The serialization format of choice is YAML, and the current backend implementation supports YAML presentation definitions stored in Witboost's database. This YAML representation of the page is a structure that maps fields of the object to present to components exposed by Witboost. Witboost provides a catalog of these components out-of-the-box: a set of components implementing generic functions, like showing a string, and others that implement specific functions of the program in an opaque way, like the marketplace Q&A widget.
Registering a Custom View
To register a Custom View, if you have the platform.custom-view.edit permission, you can manage custom views directly through the Witboost UI:
- Navigate to the Administration Panel in Witboost
- Click on "Custom Views" in the navigation menu, the following page will open:
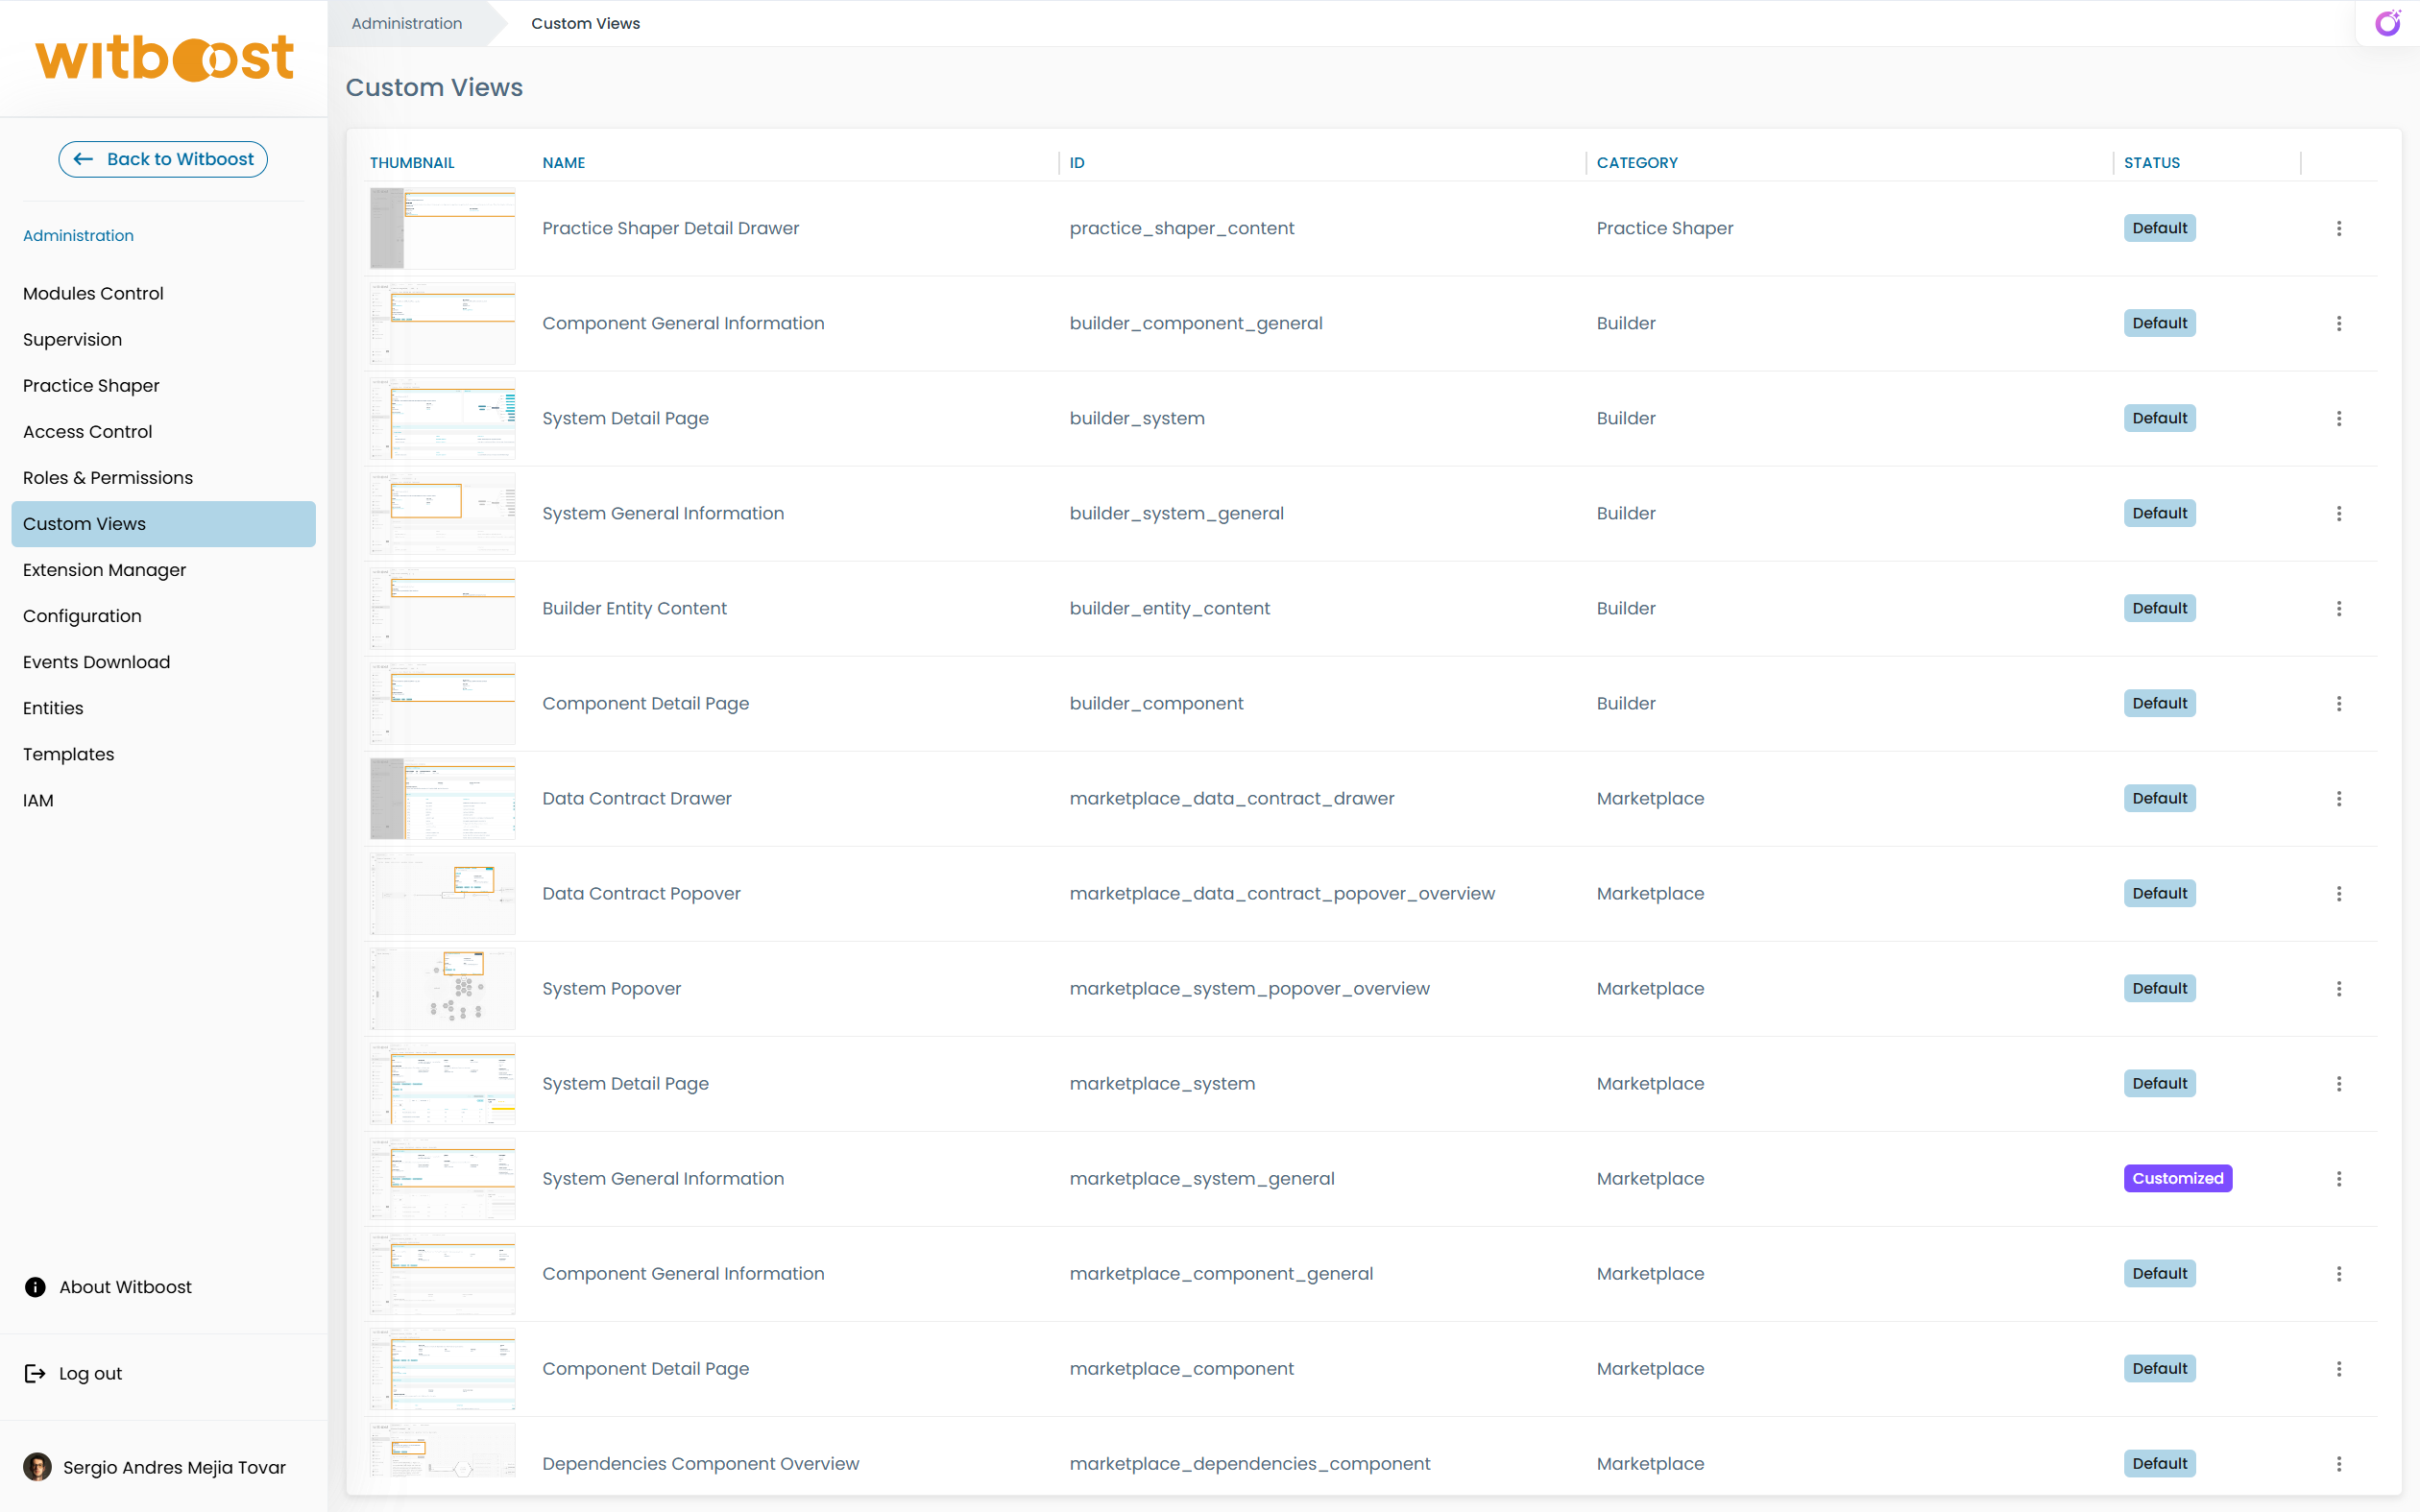
- To register a custom view:
- Select the View you want to customize from the list, matching its name, category and ID (e.g., System General Information on Category Marketplace with ID
marketplace_system_general) - Click on Add Customization. Give it a Name and a Description
- Optionally, select a specific Type (entity type) and/or Template (Use Case Template) to apply this Custom View only to a subset of entities.
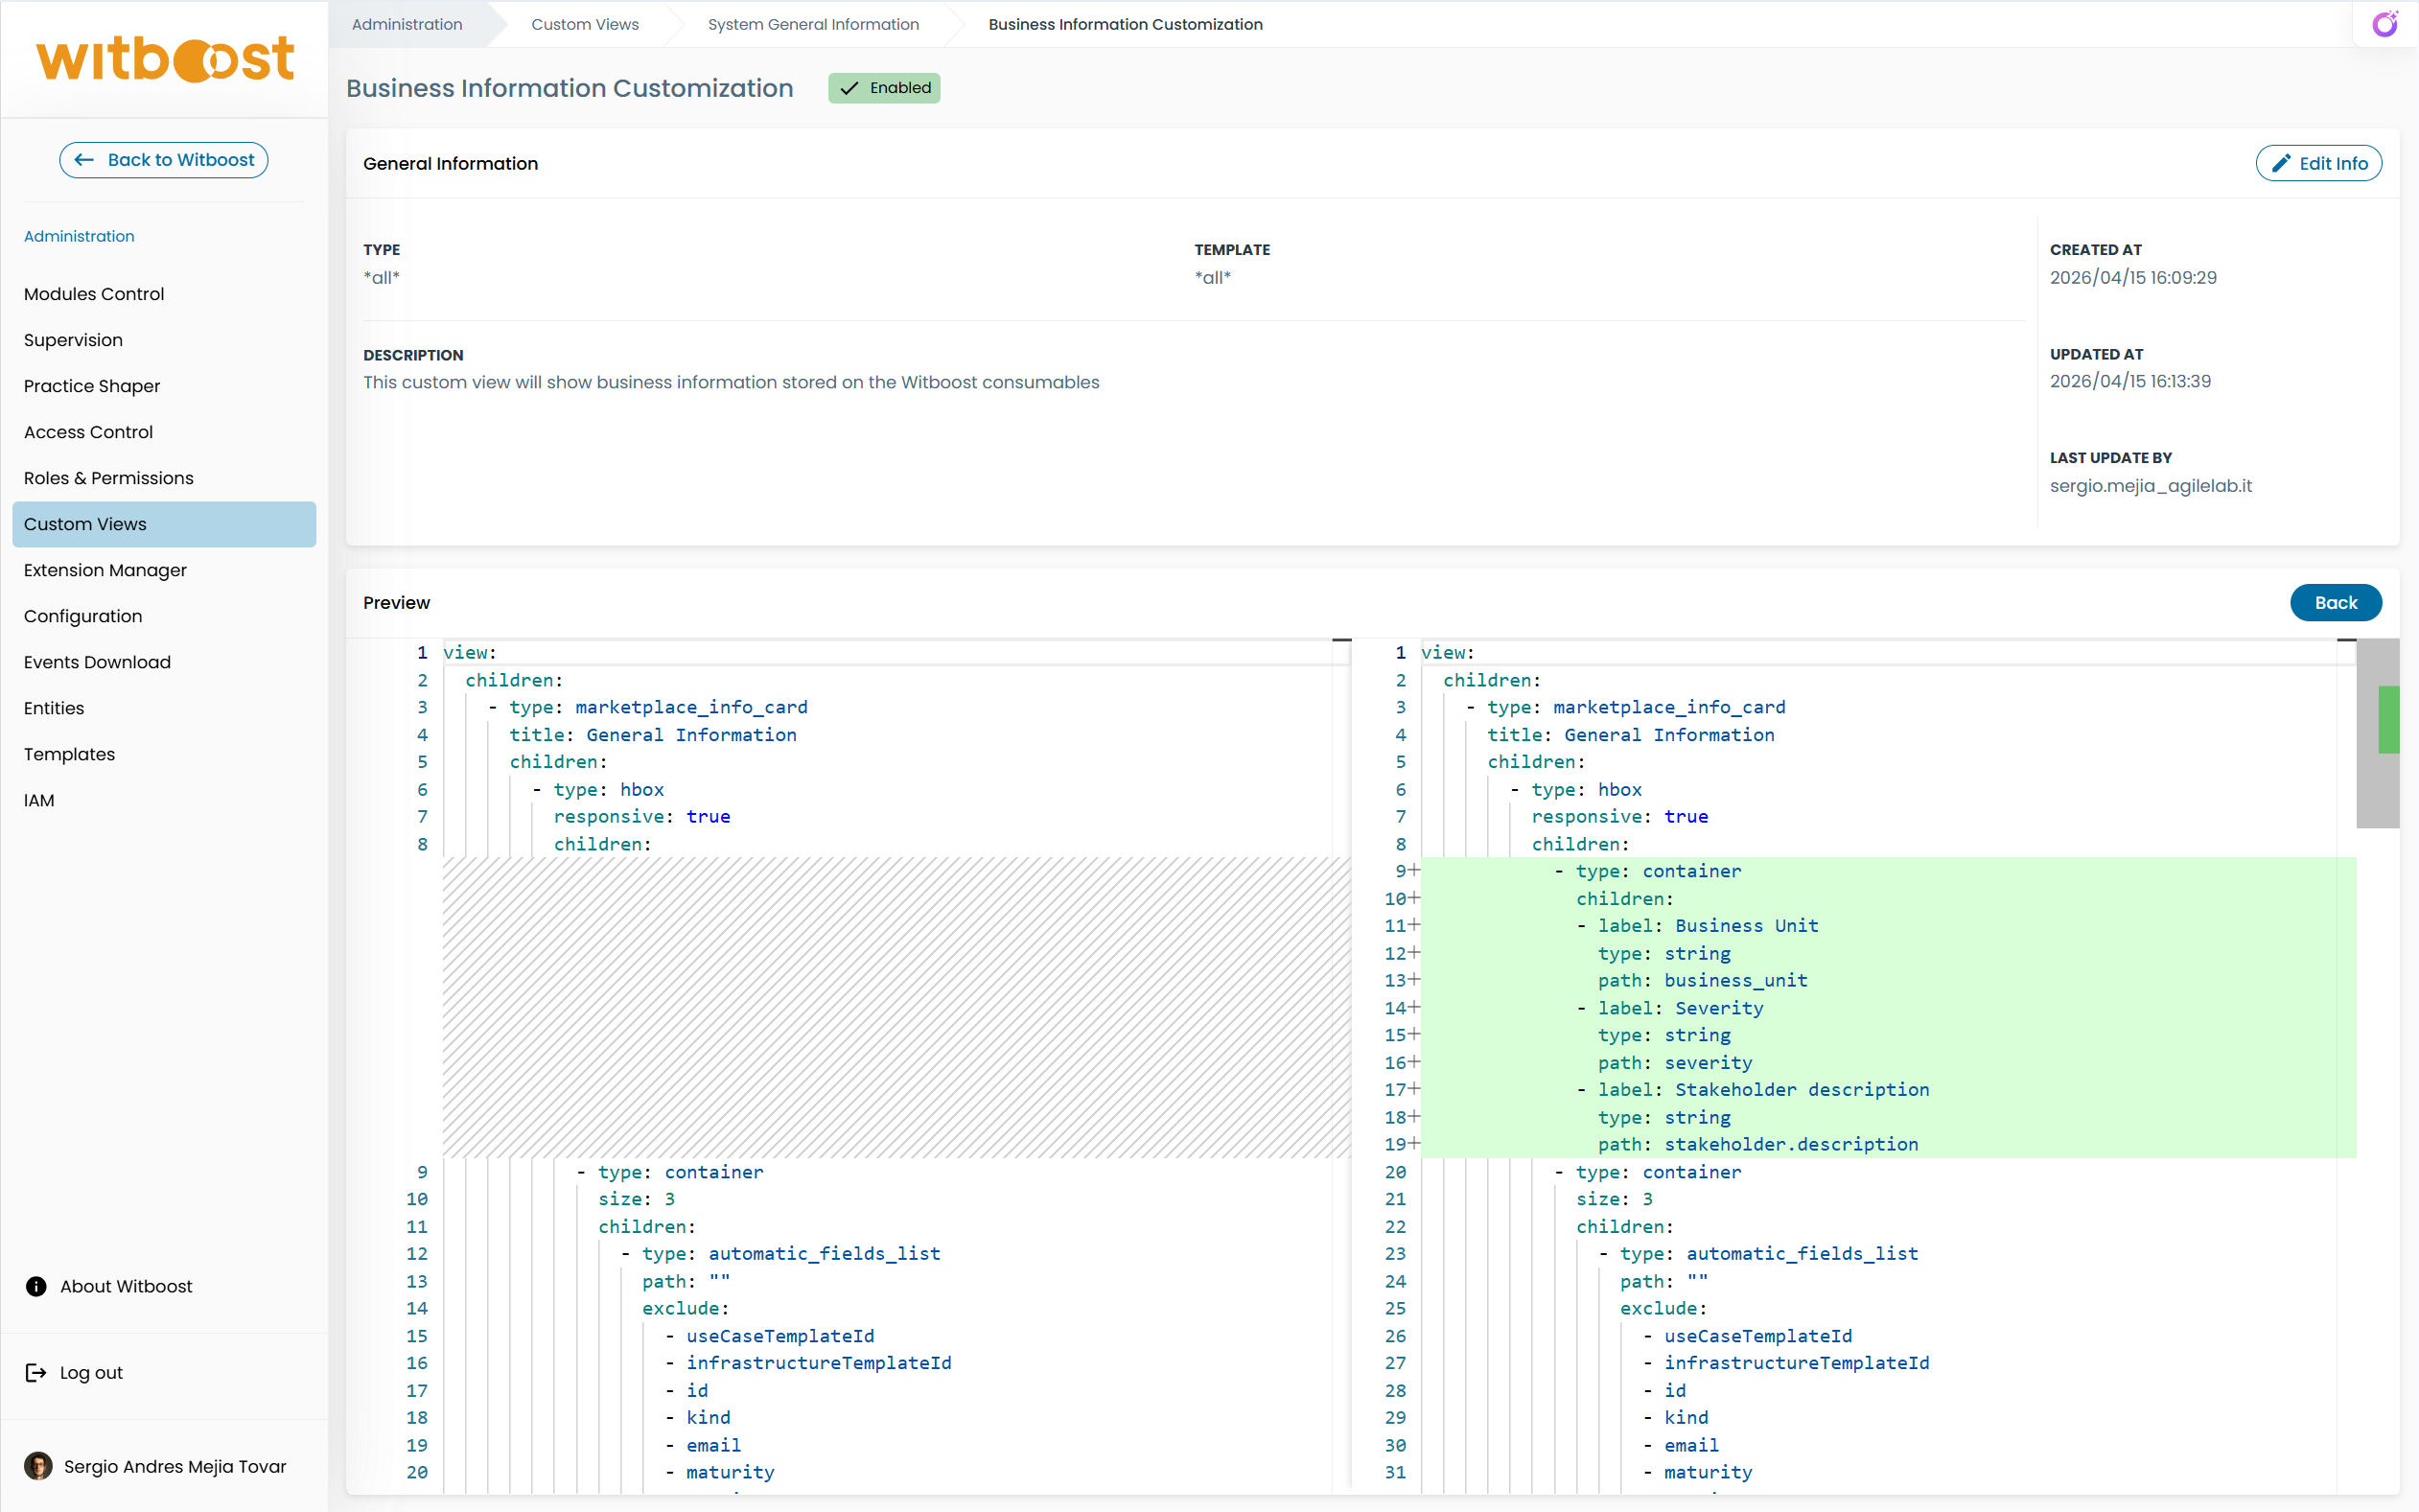
- Click Add. Witboost will initialize the custom view with the default or parent configuration which you can edit, compare to the old version and save it.
- Select the View you want to customize from the list, matching its name, category and ID (e.g., System General Information on Category Marketplace with ID
- To edit an existing custom view:
- Find the custom view in the list and click on it. Select the Customization you want to edit and click on it.
- Edit the YAML definition in the editor
- Use the "Compare" button to review your changes before saving
- Click "Save" to apply changes immediately
Changes to custom views are applied immediately without requiring any redeployment or restart of the platform.
For a detailed walkthrough with screenshots, see the Customize the Marketplace tutorial.
Selecting the right Custom View
Each page for which Custom Views are available is identified by a single page ID (like marketplace_system for the system details page in the marketplace). If you want to define a new page for all the entities, you can simply add a new custom view entry for that page ID, without specifying any other fields.
When there isn't any custom definition, the page will show the default defined in the code.
The list of pages that can be customized is:
| Page ID | Page Description | Input Object |
|---|---|---|
| marketplace_data_contract_drawer | The data contract drawer in the Data Contracts page. | Marketplace Component |
| marketplace_system_general | The system General Info card (used by default in the marketplace_system page). | Marketplace System |
| marketplace_component_general | The component General Info card (used by default in the marketplace_component page). | Marketplace Component |
| marketplace_system | The page containing the system details page in the marketplace. | Marketplace System |
| marketplace_component | The page containing the component details page in the marketplace. | Marketplace Component |
| marketplace_search_system | The content shown inside the card of a system search result in the search page. | Marketplace Search Result |
| marketplace_search_component | The content shown inside the card of a component search result in the search page. | Marketplace Search Result |
| marketplace_dependencies_component | The content shown inside the card of a component in the Dependencies tab drawer | Marketplace Dependencies Component |
| marketplace_system_popover_overview | The content shown inside the popover of a system in the Visual Discovery and Data Contracts tab. | Marketplace System Base |
| marketplace_data_contract_popover_overview | The content shown inside the popover of a data contract in the Data Contracts tab | Marketplace Component |
| builder_system_general | The system General Info card (used by default in the builder_system page). | Builder System |
| builder_component_general | The component General Info card (used by default in the builder_component page). | Builder Component |
| builder_system | The page containing the system details page in the builder. | Builder System |
| builder_component | The page containing the component details page in the builder. | Builder Component |
| builder_system_prototype | The page describing a system prototype in the builder. | Builder System Prototype |
| builder_entity_content | The General Info card for all other builder entities. | Builder Entity |
| practice_shaper_content | The page with the type details in the practice shaper. | Practice Shaper Entity |
The Input Objects are:
-
Marketplace System Base: the whole system descriptor, and_computedInfothat contains extra information such aspublished_at. -
Marketplace Component: the whole component descriptor. This is enriched with an additional field_systemthat contains the whole system descriptor. If the component has sub-components, an additional_componentsByKindis defined, which contains the sub-components list grouped by kind. If the component is a data contract (or takes part in a parent data contract), an additional_dataContractStatusis defined, containing information about the last data contract evaluation result, such astargetValidationsandoutcome -
Marketplace System: Same asMarketplace System Base, but also includes_componentsthat contains all of its components,_selectedComponentswhich contains the components selected for an action,_componentsByKindthat contains the same list grouped by kind. -
Marketplace Search Result: Same asMarketplace System Base, but also includesexpandedthat can be used to show conditionally some data depending on if the result card is currently expanded or collapsed. -
Builder System: an object with a fieldentitythat contains the whole system entity stored in the builder. Another fieldcomponentscontains all of its components. -
Builder Component: an object with a fieldentitythat contains the whole component entity stored in the builder. -
Builder System Prototype: an object that includes the core metadata of the System Prototype, plus aparametersfield. The parameters field contains an entry for each section defined in the System Prototype Template—each entry is named after its respective section and stores the data provided for that section via the template. -
Practice Shaper Entity: a complex object with anentityfield that contains the entity object stored in the Practice Shaper. Then it has also the following fields:tags: resolves both of the possible entity's tags (the one inmetadata,spec, andspec.mesh)urn: this is the resolved URN of the entitytaxonomyLabel: this is the taxonomy label of the entitytaxonomies: list of relations with other taxonomies
-
Marketplace Dependencies Component: the whole component descriptor, enriched with an additional field_computedInfothat contains the full instance row read from the marketplace.
Specific Custom Views for different entities
In case you would like to show different pages for different entities, you can define a custom view for each entity, by specifying the entity in the custom view definition. To identify an entity, you can specify the entity type and/or the entity use case template ID:
- the entity type is a string that identifies the entity type as defined in the Practice Shaper (like
workloadoroutputport); - the entity use case template ID is the string that identifies the use case template of the entity (every descriptor contains a
useCaseTemplateIdfield assigned by the template used to create it).
When multiple custom views are defined for the same page, the system will select the one that matches the entity type and the entity use case template ID, if specified. If no match is found, the system will select the one that matches the use case template ID, if specified, and then the one that matches the entity type. If no match is found, the system will select the one that doesn't specify either the entity type or the entity use case template ID. For example, when rendering a certain page, in case of a descriptor with useCaseTemplateId equal to template1 and entity type equal to workload, the system will select:
- first, the custom view that specifies the entity type
workloadand the use case template IDtemplate1; - if not found, the custom view that specifies the use case template ID
template1; - if not found, the custom view that specifies the entity type
workload; - if not found, the custom view that doesn't specify either the entity type or the entity use case template ID.
- finally, if no custom view is defined for the page, the system will show the default one defined in the code.
Custom View inclusion
Custom Views allow the platform administrators to include inside a page another custom view. This is useful when you want to reuse a part of the page in different contexts. The inclusion is done by specifying the page ID of the custom view to include in the include field of the custom view definition.
This is very useful in case you want to show the same information on different pages, or for different entities. For example, showing the same system details in some components, without rewriting the same code every time.
The elements that you can include out of the box are:
- marketplace_component_general: this is the card that shows the general information of a component in the marketplace;

- marketplace_system_general: this is the card that shows the general information of a system in the marketplace;

- builder_system_general: this is the card that shows the general information of a system in the builder;
- builder_component_general: this is the card that shows the general information of a component in the builder;
By including the custom views above, you can avoid redefining the same components on different pages, and you can be sure that the information is consistent across the pages.
Redefining path references
The paths used in components are typically defined with the data object as the starting point. However, some components can redefine the starting point for all of their child components.
One example of this behavior is the grid_sequence component. When given a path property that points to an array in the data structure, the grid_sequence component will have its children refer to the array elements as their root object. This ensures that the reference paths only include the array elements, without the need to express a full path from the original root object. Additionally, the parent component provides an extra property called parent in the new root, which allows access to the original root of the data object.
This flexibility in redefining the starting point is particularly useful when working with complex data structures that involve arrays within arrays.
Here's an example to illustrate this concept:
Root Object
myArray:
  - name: Name1
    nestedArray:
      - description: Description11
      - description: Description12
  - name: Name2
    nestedArray:
      - description: Description21
      - description: Description22
Custom View
- type: sequence
  path: myArray
  children:
    - type: string
      label: Name
      path: name
    - type: grid_sequence
      path: nestedArray
      children:
        - type: string
          label: Description
          path: description
In the example above, the sequence component is used to iterate over an array called myArray and then iterate on its child nestedArray. For each element in nestedArray, it displays the description property. The sequence component will use as root objects for its children the elements of myArray. Then, the grid_sequence component will use the elements of nestedArray as root objects for its children.
You can obtain the same result by specifying a new root object for the children of a component by adding a new_root component. The new_root component will redefine the starting point for its children, allowing you to access the properties of the new root object directly.
Some more complex components work by exploring the props of its first-level children (for example table). For this reason, it is not possible to use components like new_root, because it will create a single column instead of the one defined.
Correct
- type: table
  children:
    - type: string
      label: Name
      path: metadata.name
    - type: string
      label: Description
      path: metadata.description
Wrong
- type: table
  children:
    - type: new_root
      path: metadata
      children:
        - type: string
          label: Name
          path: name
        - type: string
          label: Description
          path: description